How to Iron On Patches Without Ruining Your Clothes
The straight-talking guide for Australians, because a good patch actually deserves to stay on.
The Thing Nobody Tells You Before You Start
Most iron-on patches that fail do not fail because of the patch.
They fail because of one small mistake made in the first 60 seconds of application, usually the iron was not hot enough, steam was left on, or the fabric was not right for heat bonding in the first place.
Get those three things right, and the rest is simple. This guide makes sure you do.
Whether you are ironing a custom-embroidered patch onto a footy hoodie in Brisbane, decorating a school bag in Perth, or applying team patches to training gear in Melbourne, the method is the same, and it works whenever it is followed correctly.
First (Check Your Fabric Label)
Before anything else, find the care label on your garment and read it.
This is not optional. It takes ten seconds and tells you whether heat bonding is even possible on what you are working with.
Iron-on patches bond well to:
- Cotton
- Denim
- Canvas
- Polyester blends
- Most heavy cotton-blend hoodies and jackets
Never apply iron-on patches to:
- Nylon (heat melts and buckles the surface permanently)
- Rayon (scorches faster than you expect)
- Leather and vinyl (heat causes irreversible surface damage)
- Waterproof or DWR-coated fabrics (the iron destroys the coating)
- Silk ( not suitable for this level of heat at all)
This matters particularly in Australia because a huge proportion of everyday sports bags, training gear, and outdoor clothing is made from nylon or technical synthetic fabrics. Applying a hot iron to those materials not only prevents the patch from bonding, but it also damages the garment itself.
If your garment is synthetic, skip the iron entirely and sew the patch on instead. Sewing works on every fabric without exception.
What You Need
Straightforward stuff ( all available at Spotlight, Lincraft, or Bunnings):
| Item | What It Is For |
| Household iron | Must reach maximum heat (no steam) |
| Ironing board or padded surface | Two folded towels on a bench work fine |
| Press cloth | A cotton tea towel, an old pillowcase, or a piece of plain cotton fabric |
| Measuring tape | Only if you need a perfectly centred placement |
| The patch | Face up, adhesive side down. |
A quick note for Australians buying irons: most standard Australian household irons reach between 200 and 215 degrees on the highest cotton setting, which is plenty to activate quality iron-on patch adhesive. The issue is rarely the iron; it is always the technique.
Step-by-Step: How to Iron On Patches
Step 1 (Set Up Your Surface)
Set up your ironing board. No ironing board? Fold two bath towels and place them flat on a kitchen bench or dining table. You need a firm, but slightly padded surface. Padding helps the iron make full, even contact with the patch beneath the press cloth.
Never iron on a bare hard surface without padding. It reduces contact pressure and weakens the bond.
Step 2 (Heat the Iron Properly)
Set the iron to its highest heat setting. This is usually the cotton or linen setting on Australian irons, the dial position marked with three dots or the word MAX.
Turn the steam function completely off. This is critical. Steam introduces moisture into the adhesive layer during activation, preventing it from bonding cleanly to the fabric fibres.
Wait two to three full minutes for the iron to reach working temperature before you touch the garment. An iron that looks hot but has not fully stabilised at maximum temperature is one of the most common reasons patches lift after the first wash.
Step 3 (Plan Your Placement Carefully)
Before the heat touches anything, sort out exactly where the patch is going.
Hold the patch against the garment in different positions. Step back and look. Ask someone else if you need a second opinion. Once the adhesive activates and comes into contact with the fabric, you cannot reposition it cleanly without leaving residue.
For centred placement on a jacket back, front pocket, or sleeve, use a measuring tape to find the true centre and mark it with a small piece of masking tape or a fabric marker dot. These wash out later.
Custom embroidered patches from quality makers like StitchKrafts Australia come with crisp, clean edges that make positioning easier. There is no fraying or blurry border to second-guess. What you see before pressing is what you get after.
Step 4 (Pre-Warm the Fabric)
Lay the garment flat and smooth it completely on your ironing surface, right side up. Smooth out any wrinkles in the application area. A patch pressed onto wrinkled fabric stays wrinkled permanently.
Place the press cloth, your cotton tea towel, or pillowcase over the area where the patch will go. Press the hot iron firmly over the press cloth for about 15 to 20 seconds to warm the fabric.
This pre-warming step gets skipped constantly. It should not be. Warm fabric accepts the patch adhesive more quickly and evenly, producing a bond that holds edge-to-edge rather than just in the centre. It is the difference between a patch that lasts years and one that starts lifting at the corners after a month.
Step 5 (Position the Patch)
Set the iron aside on its heel. Remove the press cloth.
Place the patch exactly where you want it, adhesive side down, face side up. Make sure it is sitting completely flat. Any curled edge or lifted corner will not bond and will begin to peel within days.
Check it one last time. Then leave it exactly where it is.
Step 6 (First Press 60 Seconds)
Drape the press cloth back over the patch.
Place the iron directly over the patch. Press straight down with firm, even pressure.
Hold for a full 60 seconds. Do not slide the iron. Do not rock it side to side. Do not lift and reposition.
Sliding the iron while the adhesive is activating moves the patch and smears the glue into the fabric around it. You end up with a crooked patch and adhesive residue that is difficult to remove. Press down and stay still for the full 60 seconds.
After 60 seconds, lift the iron straight up and away.
Step 7 (Second Press Another 60 Seconds)
Keep the press cloth in position and press again. Same spot. Same pressure. Same 60 seconds without moving.
Two full 60-second presses are the correct standard. One press alone is insufficient for most quality patches, particularly custom embroidered patches with thick thread coverage, or larger patches where the adhesive layer takes longer to heat through from edge to edge on heavier fabrics like denim and canvas.
Step 8 (Check Every Edge)
Lift the press cloth and set it aside. Gently press each corner and edge of the patch with one fingertip to test the bond. Do not peel, press lightly and feel whether the patch is sitting firmly or gives slightly.
If any corner or edge feels loose, replace the press cloth and press again for 60 more seconds. Check again. Repeat until every edge feels solid.
Rushing past this check is why people end up ironing the same patch four times over a fortnight. Do it properly once.
Step 9 (Press From the Back)
Flip the garment over so the reverse side of the fabric faces up.
Now press the hot iron directly against the back of the fabric; no press cloth is needed on this side over the patch area: firm pressure, 60 full seconds.
This reverse press pushes the adhesive into the fabric from the opposite direction, significantly improving penetration into the weave. It is the step most people skip, and the most common cause of premature peeling. Do not skip it.
Step 10 (Cool Down Completely)
Lay the garment flat and leave it completely undisturbed for at least 10 minutes.
The adhesive is still warm and slightly soft immediately after pressing. Folding, hanging, wearing, or washing the garment before it has cooled and set causes the patch to shift or the edges to curl up. Always wait.
Ten minutes flat. Then it is set.
Australian Conditions and Iron-On Patches (What You Need to Know)
This section matters more than most guides acknowledge.
Heat and humidity
In Queensland, the Northern Territory, and coastal Western Australia, high ambient temperatures and humidity accelerate adhesive breakdown, particularly on bags and garments stored in hot cars or sheds. For anything you plan to use outdoors regularly in these climates, the iron-first-then-sew combination gives significantly better long-term results than iron-on alone.
Washing habits
Australian households tend to wash clothing more frequently than those in colder-climate countries, partly due to higher temperatures and greater physical activity. Iron-on patches on heavily washed items need a stronger initial bond. The two-press-plus-reverse-press method is essential, not optional, if the item will be washed weekly.
Sports and training gear
Technical fabrics used in AFL, rugby league, netball, and cricket training gear are almost exclusively synthetic. Iron-on adhesive does not grip these materials reliably. If you are decorating club training gear, always sew. If you are ordering custom embroidered patches for a club based in Sydney, Adelaide, or anywhere else in Australia, ask your supplier whether the patches come with a sew-on backing option. StitchKrafts Australia offers this specifically, and it is the right choice for anything going onto synthetic sportswear.
UV exposure
Thread colours in cheap patches fade significantly faster in Australian UV conditions. Quality patches use colourfast thread designed for extended outdoor wear. If the patch is going on a hat, a bag, or anything that spends time in direct sunlight, patch quality matters more than usual here.
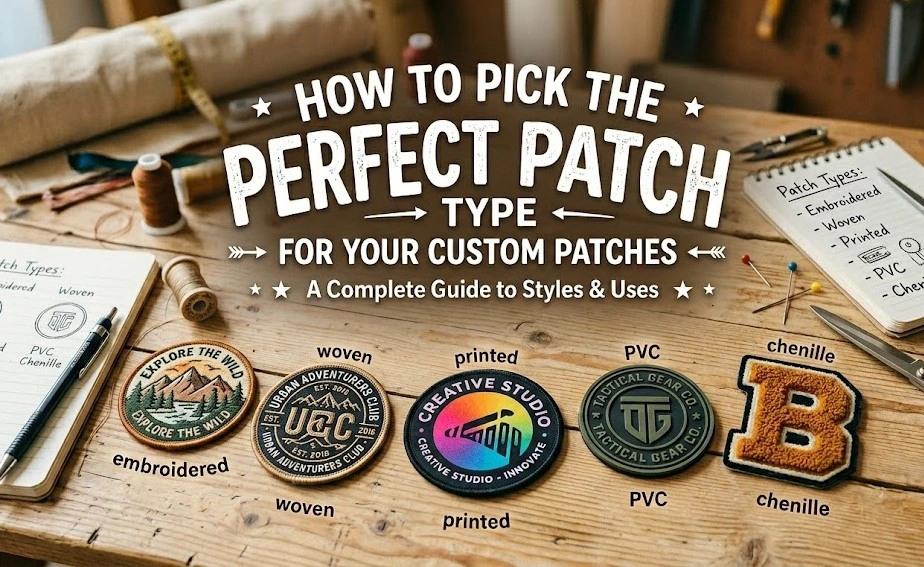
Which Patch Type Are You Working With?
The basic ironing method is the same across most patch types, but there are differences worth knowing:
Custom Embroidered Patches
The most common patch type and the most popular in Australia for clubs, schools, businesses, and personal customisation. Dense thread on a woven base. Clean edges. The raised thread surface means the iron does not contact the full face evenly, which is exactly why the press cloth is essential for these. Even heat distribution through the press cloth ensures the adhesive bonds consistently across the entire backing, not just the flat sections.
Custom embroidered patches from StitchKrafts Australia are made with full-coverage adhesive across the entire backing, ensuring a consistent bond from edge to edge and no weak spots at the corners where adhesive coverage is thin.
Woven Patches
Thinner and flatter than embroidered patches. Bond slightly faster than embroidered ones. One 60-second press plus the reverse is often sufficient, but checking the edges carefully after the first press is still important before calling it done.
Custom Sublimation Patches
Sublimation patches use a smooth printed surface rather than a raised thread. They bond well on cotton and canvas. Avoid applying sublimation patches to fabrics that cannot tolerate high heat. The sublimation dyes can be damaged by excessive heat on the face side, which is another reason the press cloth is important. Always press the cloth down before the iron goes on.
PVC Patches
Do not use iron-on application for PVC patches unless they specifically state they come with a heat-seal backing. Most PVC patches are designed to be sewn. Applying direct heat to a PVC face causes the material to warp and discolour permanently.
Felt Patches
Felt patches with iron-on backing bond well to cotton and canvas. Use a slightly lower temperature than you would for embroidered patches, as felt can scorch at excessive heat. Two 45-second presses rather than 60 seconds, plus the reverse press, is the right approach for felt.
Understanding Custom Vector Art and Why It Matters When Ordering
If you are ordering custom embroidered patches or custom sublimation shirts in Australia and bringing your own design, you will be asked for vector artwork. Here is what that means and why it matters.
Vector artwork is design artwork built from mathematical lines and shapes rather than pixels. Unlike photographs or screen-captured logos, vector files scale to any size without losing sharpness or becoming blurry. A design that is 3 centimetres wide and one that is 30 centimetres wide both come from the same vector file and look equally sharp.
For custom embroidered patches, vector artwork is used to digitise the design, converting your shapes, colours, and outlines into precise stitch paths for the embroidery machine. A clean vector file produces sharp embroidery with accurate colour reproduction. A low-resolution JPEG produces fuzzy embroidery with colour bleeding between sections.
For custom sublimation shirts, which are increasingly popular across Australia for team uniforms, event merchandise, and corporate gifting, vector artwork ensures the design prints accurately at the correct scale and with the right colour values. Sublimation printing reproduces colour with exceptional precision, but only when the source artwork is equally precise.
Vector files are typically saved as .ai (Adobe Illustrator), .eps, or high-resolution .pdf formats. If you do not have a vector version of your logo or design, most quality patch and merchandise suppliers offer custom vector art services to redraw your artwork in the correct format. This is worth sorting before you place your order; it avoids delays and ensures the final patches and shirts look exactly as intended.
StitchKrafts Australia offers custom vector art services as part of the ordering process, which is particularly useful for small businesses, sports clubs, and community groups across Australia that have a logo in JPEG format but need it properly prepared for embroidery and sublimation production.
Why Your Patch Might Be Peeling and How to Fix It
If a patch you applied is already lifting, one of these is the cause:
The iron was not at full heat. Partial heat produces a partial bond that feels solid at first but begins lifting with washing. There is no fix after the fact; remove the patch, prep the surface, and reapply properly from scratch.
Steam was on. Moisture in the adhesive layer during activation prevents a clean bond. Always turn the steam off completely before pressing.
The press time was too short. Sixty seconds twice is the minimum. A 20-second press is not enough to heat the adhesive layer all the way through, particularly on denim or canvas.
The garment was washed too soon. Most iron-on patches need 24 hours of undisturbed setting time after application before the first wash. Washing the same day significantly increases the chance of edge lifting.
The fabric is synthetic. Iron-on adhesive grips cotton and denim; it does not reliably grip nylon, polyester, or coated fabrics. If the fabric is synthetic, remove the patch and sew it on instead.
The reverse press was skipped. Without the reverse press, the adhesive sits on top of the fabric weave rather than penetrating it. It looks bonded but lacks the depth of grip needed for it to be washable. Always flip and press from the back.
The patch quality was poor. Cheap patches use thin, unevenly distributed adhesive. The centre bonds reasonably, but the edges, which matter most, bond poorly. This is the hardest problem to solve with a better technique because the fundamental product is the limiting factor. Quality custom embroidered patches use full-coverage backing with consistent adhesive weight across the complete reverse side.
Iron On or Sew On (Quick Reference for Australian Conditions)
| Garment or Fabric Type | Best Method | Notes |
| Cotton hoodie or tee | Iron-on | Two presses plus reverse. Wait 24 hours before washing. |
| Denim jacket | Iron-on then sew | For daily wear in Australian conditions, stitch the border after ironing for maximum longevity. |
| Canvas bag | Iron-on | Three presses on heavy canvas. Reverse press essential. |
| Nylon sports bag | Sew only | Never iron nylon. |
| AFL/NRL/netball training gear | Sew only | All synthetic. Iron-on adhesive will not grip. |
| Custom sublimation shirt (polyester blend) | Light iron, then sew | Use a silicone press sheet. Sew a border for security. |
| School uniform | Iron then sew | Frequent washing demands maximum bond. |
| Hat or cap | Sew only | The curved brim makes even iron pressure impossible. |
| Leather | Sew only | Heat damages leather permanently. |
| Waterproof outdoor gear | Sew only | Iron destroys DWR coating. |
Frequently Asked Questions
Can you iron on patches without a press cloth?
You can, but you should not. Without a press cloth, the iron makes uneven contact with the patch surface the heat concentrates through the plate holes rather than spreading evenly. This produces an inconsistent bond and risks leaving iron marks or scorch lines on the patch face. Always use a press cloth, even if it is just a clean tea towel.
How long should you hold the iron on a patch?
Sixty seconds with firm, steady pressure twice, without moving the iron between presses. Then flip the garment and press from the back for another 60 seconds. This three-stage method is the correct standard for a bond that holds through repeated Australian washing conditions.
Can you iron patches onto polyester?
On polyester blends, yes, with a thick press cloth and slightly lower temperature than you would use on cotton. On 100 percent polyester performance or sportswear fabrics, iron-on adhesive rarely grips well enough for a lasting bond. Sew on anything that is predominantly synthetic.
Do you have to wash the garment before ironing on a patch?
Yes, if it is new or has been treated with fabric softener. Fabric softener leaves a coating on fabric fibres that prevents adhesive bonding. Wash the garment without softener and dry it completely before applying any patch.
Can you use a hair dryer instead of an iron?
No. A hair dryer does not produce the sustained, even heat required to activate the iron-on adhesive fully. It is useful for softening the adhesive when removing an old patch, but it cannot replace a proper iron for applying one. Use a household iron at maximum heat with no steam.
How long before you can wash a garment after ironing on a patch?
At least 24 hours. The adhesive continues to cure and harden after pressing washing too soon, before the bond has fully set, is one of the most reliable ways to end up with a peeling patch. Leave it flat and unwashed for a full day.
What is the difference between a heat seal patch and an iron-on patch?
Nothing, they are the same thing. Both terms describe a patch with a thermoplastic adhesive backing that activates under heat and bonds to fabric as it cools. The two terms are used interchangeably by suppliers and customers alike.
Is it better to iron on patches or sew them on for Australian conditions?
For anything worn or used daily, and particularly anything washed frequently in warm Australian weather, the iron-first-then-sew method gives the best long-term result. Iron the patch precisely, then stitch around the border to make the hold permanent. For nylon and synthetic fabrics, sew only. Iron-on alone is sufficient for occasional-use items on cotton and denim.
Two Rules That Cover Everything
Rule one: Full heat, no steam, two full presses plus the back. Every iron-on failure comes back to one of these four things being missed. Do all four and the patch bonds cleanly every time.
Rule two: The patch quality is half the job. The best technique in the world cannot compensate for thin, inconsistent adhesive. Custom embroidered patches from quality makers where the backing adhesive is applied evenly across the full reverse side, edge-to-edge bond more cleanly, hold longer, and look better on every garment they are applied to.
Get those two things right, and your patches stay put through Queensland humidity, through weekly washing, through years of daily use.