

How to Sew a Patch on an Apron for Restaurants and Cafes
Quick answer: Wash the apron first, mark the spot with a ruler, pin the patch flat, and sew around the whole edge with small stitches using polyester thread. Keep the knots on the inside, and trim every loose thread. For a whole team, make a cardboard template so every apron looks the same. A sewn patch survives hot washes and bleach far better than a glued one.
Aprons have a hard life. They get hot water, grease, flour, and lots of washing. A patch that looks fine on day one can look sad after a week if it was put on the wrong way. This guide shows you how to do one apron, then how to do twenty, and how to keep them clean and safe in a kitchen.
The Short Version: 6 Quick Steps
- Wash the apron and let it dry. This stops shrinking later.
- Mark the spot with a ruler and a washable pen.
- Pin the patch flat at all four corners.
- Sew around the edge with small, even stitches.
- Tie off on the inside, and trim loose threads.
- Test with a tug, then wash it to check it holds.
Now let's go through each step properly.
Part 1: Doing One Apron
Step 1: Check Your Fabric
Most aprons are made from one of these.
- Cotton canvas or denim. Thick and strong. It is easy to sew, but you will need a strong needle.
- Poly cotton blend. Light and common in cafes. It holds up to hot washing.
- Polyester or waterproof coated. Wipes clean, but the coating can make needle holes visible. Use a fine needle.
- Thin cotton. It can pucker easily. Add a little support behind the patch, which we explain below.
Not sure? Check the tag inside. Sewing works on all of these, which is why it is the best choice for aprons.
Step 2: Wash and Dry the Apron First
New aprons often shrink the first time they are washed. If you sew a patch on first, the apron shrinks around it, and the fabric puckers. So wash and dry it first, then press it flat.
Step 3: Pick the Right Spot
Here are rules of thumb that work for most aprons.
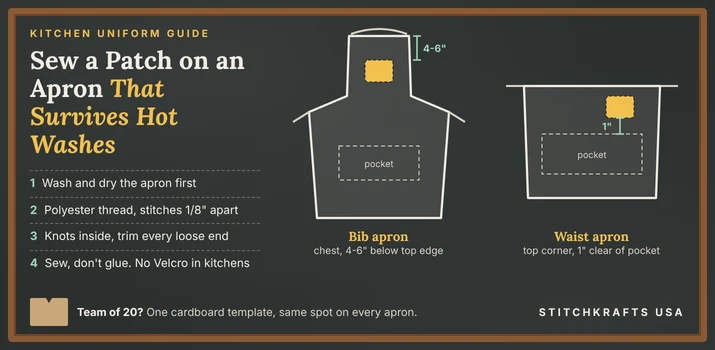
- Bib apron: Put the patch on the chest, either centered or on the left. A good spot is about 4 to 6 inches below the top edge of the bib. This keeps it clear of the neck strap and easy to see.
- Waist apron: Put the patch near the top corner, or just above the pocket. Keep it about 1 inch away from the pocket edge, so the pocket still opens fully.
- Avoid seams, straps, and tie strings. Thick layers make sewing harder, and the patch can pull as the apron moves.
Lay the apron flat, and try the patch in a few spots. Step back and look at it. Check the spot while someone wears the apron if you can, since flat and worn can look different.
Step 4: Mark It
Use a ruler and a washable fabric pen. Draw a small mark for each corner of the patch, or a light outline. Measure from the top edge and from the side, so you can find the same spot again.
Step 5: Add Support on Thin Fabric
If the apron is thin cotton, press a small piece of iron on interfacing onto the inside, behind where the patch will go. This stops the fabric from puckering. Thick canvas and denim do not need this.
Step 6: Pin the Patch Flat
Pin at all four corners, plus a few more along the edges for a large patch. Smooth the fabric with your hand as you go. Look at it again from a few feet away.
Step 7: Choose Your Thread
Use polyester thread. It handles hot water and bleach better than cotton thread, and it does not weaken as quickly in the wash. Pick a color that matches the patch border, so the stitches nearly disappear.
Double the thread for extra strength, and tie a knot at the end.
Step 8: Sew It On
Start from the inside of the apron, so your knot is hidden. Push the needle up through the apron and the edge of the patch. Then push it back down just beside it.
Keep going all the way around. Make your stitches small and even, about 1/8 inch apart. Pull the thread snug, but not tight, so the fabric stays flat.
Add two or three extra stitches at each corner. Corners get pulled the most.
If you use a sewing machine, choose a straight stitch, and go slowly around the edge. Match the top thread to the patch, and the bobbin thread to the apron.
Step 9: Finish Neatly
Tie off with a firm knot on the inside. Trim the thread close to the knot. Turn the apron inside out, and check that nothing hangs loose.
This matters more in a kitchen than anywhere else. A loose thread can end up in someone's food.
Part 2: Doing Twenty Aprons
Now the big job. A team of aprons only looks professional if every patch sits in exactly the same place.
Make a Cardboard Template
Cut a piece of cardboard the same size as your patch. Mark a small notch at the top center. Now measure from the top edge of the apron down to where the patch should start, and write that number on the card.
For each apron, line up the template with the top edge, mark the corners, and place the patch inside the marks. Every patch lands in the same spot.
Set Up an Assembly Line
Do each step for all twenty aprons at once, instead of finishing one at a time.

- Wash and press all twenty.
- Mark all twenty.
- Pin all twenty.
- Sew all twenty.
- Check all twenty.
Doing the same step again and again gets faster, and it helps every apron look alike. As a rough guide, plan about 15 to 20 minutes per apron by hand. Two people can finish a batch in an afternoon.
Test One First
Before you do the whole batch, sew a patch on one apron, and wash it a few times the way your kitchen washes them. If the stitches hold, carry on. If not, you only have one apron to fix.
Part 3: Washing, Safety, and Replacing
Washing Aprons With Patches
Restaurant laundry is tough. Here is how to help patches last.
- Sew them on, instead of using iron on glue. Hot water and strong dryers can soften glue.
- Use polyester thread, since it holds up to hot washing.
- Wash aprons inside out when you can. Check the corners now and then, and add a stitch if one lifts.
Kitchen Safety and Hygiene
Keep the inside of the apron neat, with small knots and no loose ends. Trim any thread that hangs. Check the patch edge after every few washes, since a loose patch edge can collect food and fray. If a patch starts to come apart, replace it, instead of letting threads hang.
Do not use Velcro in a kitchen. It traps crumbs, grease, and lint, and it is hard to keep clean.
When Staff Change
New people join all the time. Keep a few spare aprons with patches already attached, so a new starter can begin right away. If your logo changes, you can unpick the stitches with a seam ripper and sew on the new one.
Choosing a Patch for an Apron
Aprons are often thin, so choose a patch that is not too bulky. A classic embroidered patch works well on canvas and denim aprons, and its stitched border is easy to sew around. If your logo has small text, or your apron is light cotton, a flat woven patch sits closer to the fabric and shows small details clearly.
Common Mistakes to Avoid
Sewing before washing the apron. Using cotton thread, which can weaken in hot water. Using iron on glue on a hot wash apron. Putting the patch over a strap or pocket. Leaving loose threads or long knots. Guessing the placement on each apron. And skipping the test wash on a batch.
Frequently Asked Questions
How do you sew a patch on an apron?
Wash the apron first, mark the spot, pin the patch flat, and sew around the edge with small stitches and polyester thread. Tie off on the inside.
Can I iron a patch onto an apron?
You can on cotton, but glue can soften in hot washes. Sewing lasts much longer, especially for restaurant aprons.
What thread is best for aprons?
Polyester thread. It handles hot water and bleach better than cotton thread.
Where should a logo patch go on an apron?
On a bib apron, put it on the chest, about 4 to 6 inches below the top edge. On a waist apron, place it near the top corner, clear of the pocket.
How do I make all the patches match on a team of aprons?
Cut a cardboard template, and use it to mark the same spot on every apron.
Will a sewn patch survive commercial washing?
A firmly sewn patch with polyester thread usually does well. Test one apron first, and check the edges now and then.
Need Patches for Your Team?
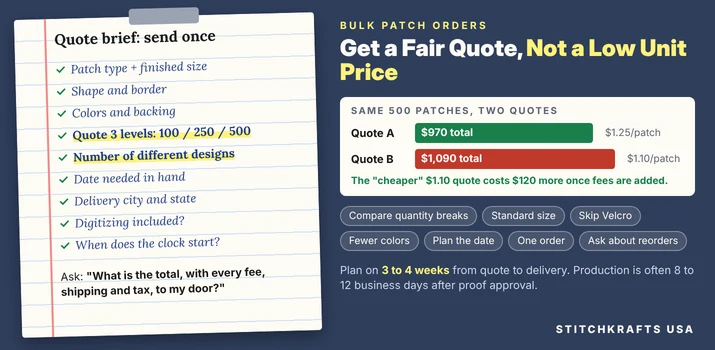
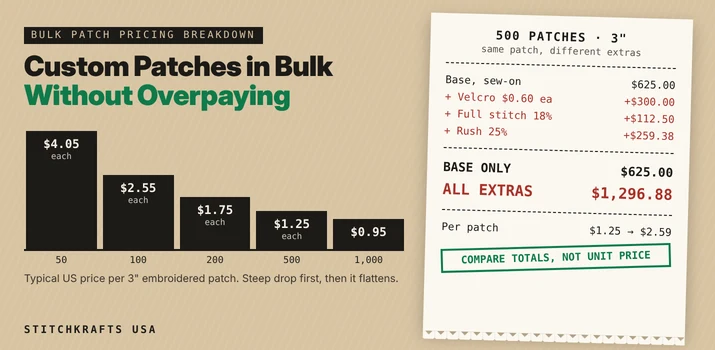
If you are outfitting a restaurant, cafe, or food business, we can make a patch to match your logo. Browse our custom patches to see the types and sizes available. StitchKrafts USA works with restaurants, cafes, and small businesses in Chicago, Austin, and across the country, and can help you pick a patch that suits your aprons.