How Long to Iron on Patches: Fast & Secure Trick (2026)
Iron-on patches make it easy to customize your clothes. You can add a logo to a jacket, fix denim, or decorate a backpack without any sewing. Just attach your design quickly and you are done.
A common question is: how long should you iron on patches to get the best results?
At StitchKrafts, we often help customers apply custom patches so they stay on longer. This guide explains how to use an iron on patch, provides clear iron on patch instructions, and covers iron on patches directions including the right temperature, timing, and tips to ensure your patch stays secure.
How Do Iron On Patches Work?
Before you start, it is helpful to understand how do iron on patches work.
Iron-on patches have a special adhesive backing that activates when heated. When you use an iron or heat press, the adhesive melts and bonds to the fabric. Once the patch cools, it attaches firmly to the clothing.
This process explains how does iron on patches work and why they are widely used for:
- Customising clothing
- Repairing torn fabric
- Adding logos or branding
- Personalising bags, hats, or uniforms
Many custom embroidered patches use this heat-seal backing because it provides a quick and reliable application.
How Long to Iron On a Patch
The most common mistake people make is not applying heat long enough.
The recommended iron on patch temperature and time is:
10–15 seconds of firm pressure at medium to high heat.
For best results:
- Set the iron to the cotton setting
- Press the patch firmly
- Keep pressing for 10 to 15 seconds
- Let the patch cool before moving the fabric
If the edges lift, repeat pressing for another 5 to 10 seconds.
These simple iron on patch instructions help create a strong and lasting bond.
Temperature for Iron On Patches
Choosing the correct iron setting for iron on patches is essential.
Recommended settings:
- Temperature: 350 F (175 C)
- Iron setting: Cotton
- Steam: OFF
Many people search for the temp for iron on patches, which usually falls around 350°F (175°C) for most cotton and denim fabrics.
Steam should be avoided because moisture can weaken the adhesive and prevent proper bonding.
Always test the heat on a hidden part of the garment first to prevent fabric damage.
How to Iron On Patches Step by Step
If you are wondering how to iron on patches or how to put on iron on patches, follow these simple steps.
Step 1: Prepare the Fabric
Place the garment on a flat ironing board. The fabric should be clean and wrinkle-free.
Pre-heat the fabric for 5 seconds to remove moisture.
Step 2: Position the Patch
Place the patch exactly where you want it.
Make sure:
- The patch is flat
- The adhesive side touches the fabric
- The design is straight
This step is important when learning how to attach iron on patches properly.
Step 3: Protect the Patch
Place a thin cloth or parchment paper over the patch.
This protects embroidery threads from direct heat.
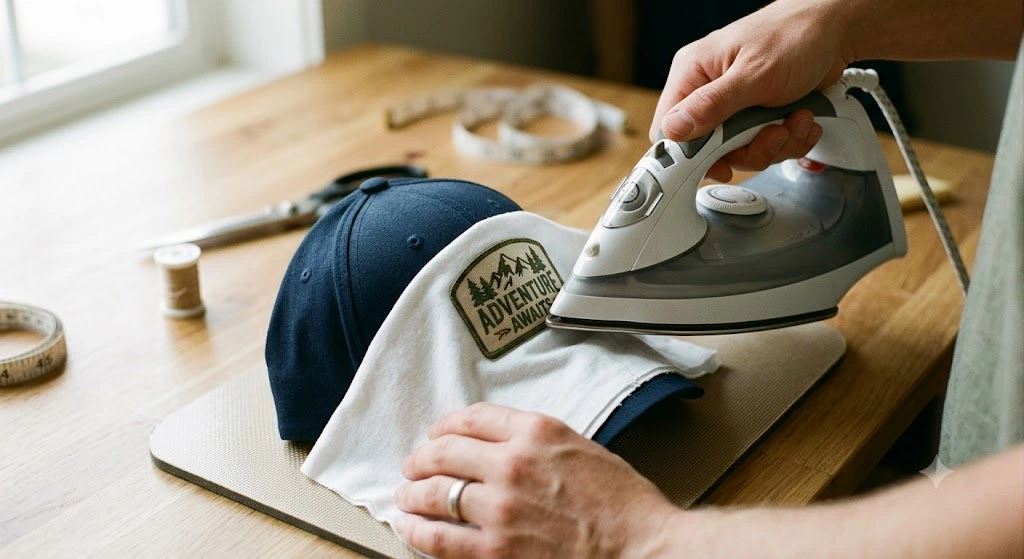
Step 4: Apply Heat
Press the iron firmly over the patch.
Apply heat for 10–15 seconds without moving the iron.
This is considered the best way to iron on a patch because sliding the iron can shift the patch out of position.
Step 5: Let It Cool
Allow the patch to cool for 1–2 minutes.
Cooling helps the adhesive bond completely.
Step 6: Check the Edges
Check if the patch edges are attached.
If the edges lift:
- Press again for 5–10 seconds
- Apply pressure around the border
These steps provide clear iron on patches directions for secure results.
How to Iron On Embroidered Patches
The process for how to iron on embroidered patches is similar, but embroidered patches require careful handling.
Tips for embroidered patches:
- Always use a cloth barrier
- Apply firm and even pressure
- Avoid excessive heat
Because embroidered patches are thicker than printed patches, strong pressure helps secure the adhesive backing.
Using a Heat Press for Iron On Patches
Many people ask about using a heat press for iron on patches.
A heat press provides consistent temperature and pressure, which helps attach patches evenly.
Recommended settings:
- Temperature: 350 F (175 C)
- Time: 12–15 seconds
- Pressure: Medium
Heat presses are commonly used when applying multiple patches to uniforms or merchandise.
Can You Use a Steamer for Iron On Patches?
People often ask if you can use a steamer for iron on patches.
The answer is no.
Steamers do not provide enough pressure or consistent heat to activate the adhesive backing properly.
For best results, always use an iron or heat press.
How to Attach Iron On Patches to Different Fabrics
Different fabrics respond differently to heat.
Best fabrics for iron-on patches:
- Cotton
- Denim
- Canvas
- Polyester blends
Fabrics to avoid:
- Nylon
- Silk
- Leather
- Waterproof materials
These fabrics may melt or prevent the adhesive from bonding properly.
Best Way to Iron On a Patch for Long-Term Hold
If you want patches to stay attached longer, follow these tips:
- Apply heat from both sides of the fabric
- Press the back of the garment for 10 seconds
- Let the patch cool completely before wearing
- Reinforce edges with stitching if possible
Many professionals combine heat application with sewing for maximum durability.
How Do You Put Patches on Clothes Without Iron?
If you are wondering how do you put patches on clothes without iron, there are alternative methods.
You can attach patches using:
- Fabric glue
- Sewing
- Heat press machines
However, ironing remains the fastest and most reliable method.
Common Iron On Patch Mistakes
Avoid these mistakes when applying patches:
- Using steam while ironing
- Not applying enough pressure
- Moving the iron during pressing
- Not letting the patch cool properly
- Using heat on delicate fabrics
Correct application ensures patches stay attached even after washing.
Iron On Patches vs Iron On Transfers
Some people also ask how to make iron on transfers when customizing clothing.
Iron-on transfers require special transfer paper and printed designs, while patches already come with a heat-activated adhesive backing. Because of this, patches are easier to apply and usually more durable than transfers.
If you prefer printed designs instead of patches, you can also explore DIY iron on transfers or learn how to print iron on images using transfer paper.
Final Thoughts
Iron-on patches are one of the simplest ways to customise clothing, repair fabric, and add branding to apparel.
Understanding how to iron on an iron on patch, choosing the correct iron on patch temperature, and applying the proper pressure ensures patches stay secure and look professional.
Whether you are applying patches to jackets, uniforms, backpacks, or hats, the right technique makes the process quick and reliable.
With proper application and care, iron-on patches can last for years while adding style, personality, and branding to your clothing.