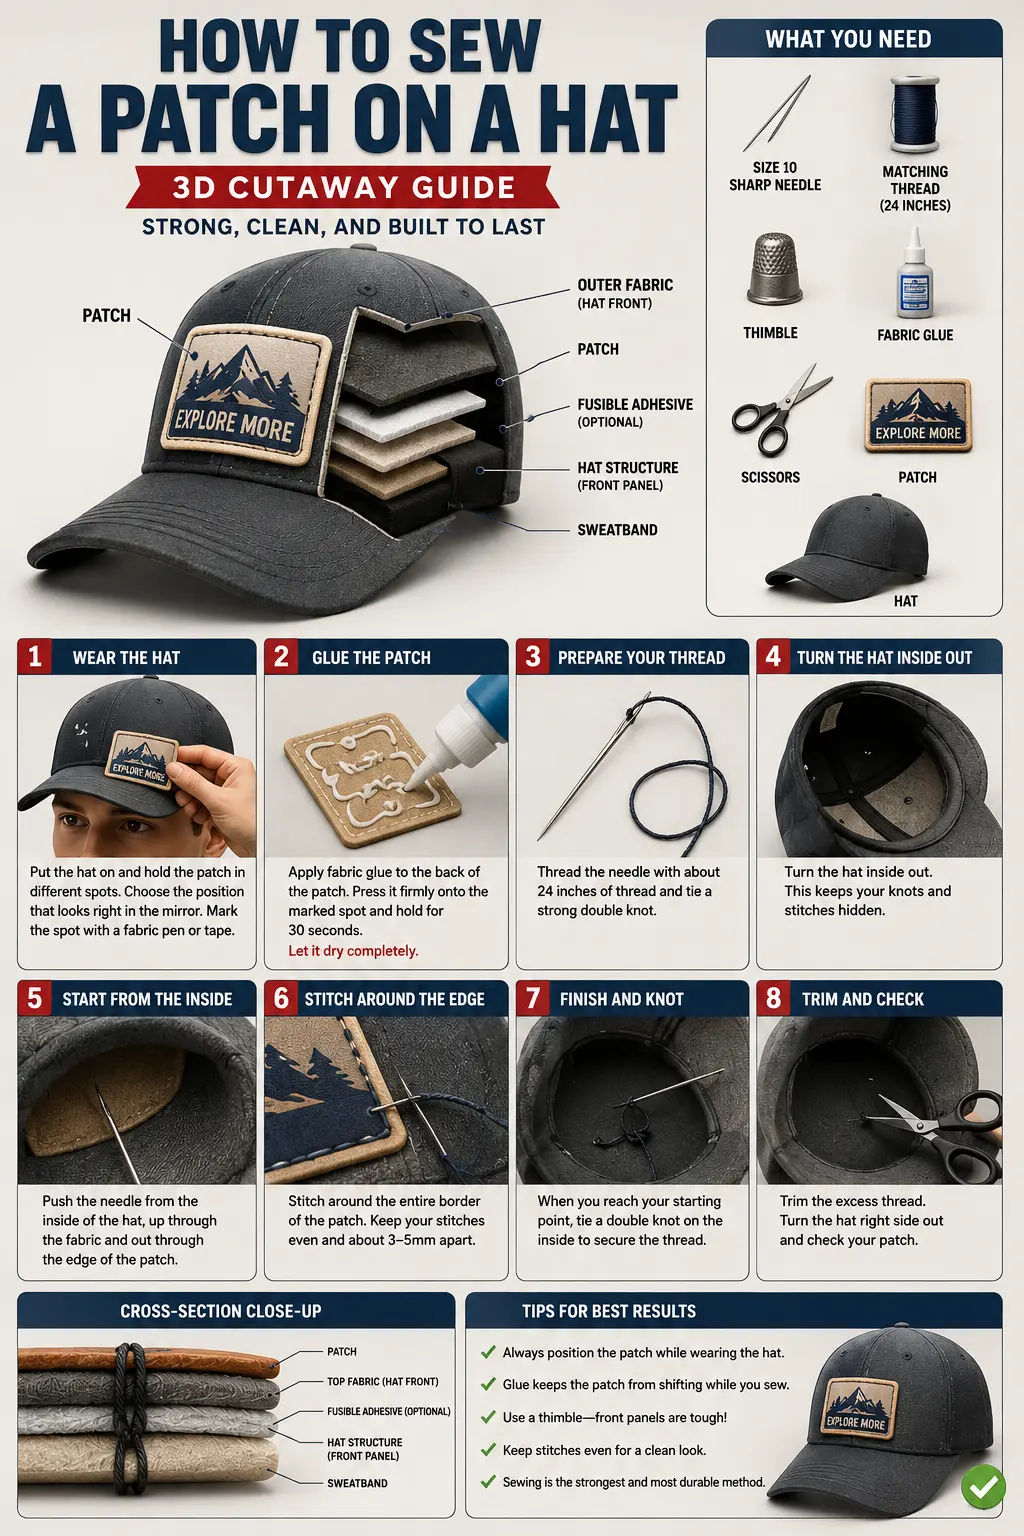
How to Iron On Patches Without Damaging Fabric
A simple guide for people in the USA who want to apply patches the right way.
Quick Answer
- Check the fabric label first.
- Set your iron to high heat with no steam.
- Put a thin cotton cloth over the patch.
- Press the iron down for 60 seconds without moving it.
- Turn the clothing over and press from the back for another 60 seconds.
- Let it cool before touching it.
Done.
Before You Start
The most important step is checking the fabric label.
If the label says Do Not Iron or Dry Clean Only, do not use an iron. Heat can damage the fabric, and the patch will not stick properly.
Fabrics That Work Well
- Cotton
- Denim
- Polyester blends
- Canvas
- Most wool blends
Fabrics You Should Not Iron Patches Onto
- Nylon because it melts easily
- Rayon because it burns easily
- Leather and vinyl because heat damages the surface
- Waterproof fabrics because heat ruins the coating
- Silk because it is too delicate
This works whether you are adding custom embroidered patches to jackets in New York, shirts in Chicago, or custom sublimation shirts in the USA for teams in Dallas or Miami.
What You Need
Iron
Use high heat and turn the steam off.
Ironing Board or Flat Table
Put towels underneath if using a table.
Cotton Cloth
Use a tea towel, pillowcase, or thin cotton cloth.
Measuring Tape
Helpful if you want the patch perfectly centered.
Your Patch
Place it face up with the glue side down.
Most irons in the USA get hot enough for iron-on patches. If the patch does not stick, the problem is usually the fabric or not pressing long enough.
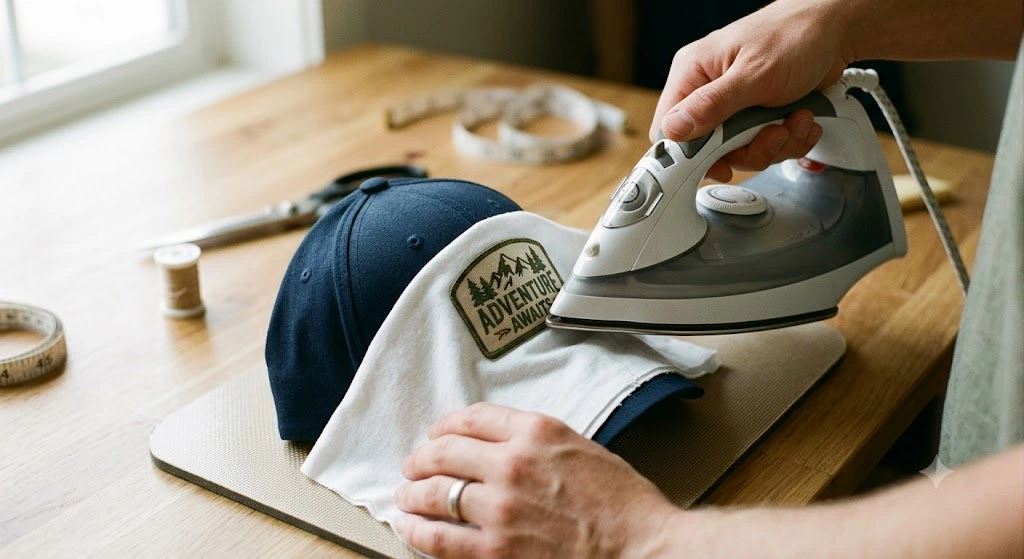
How to Iron On a Patch
Step 1: Prepare the Surface
Use an ironing board or a flat table with towels under the clothing.
A soft surface helps the patch stick better.
Step 2: Heat the Iron
Set the iron to high heat.
Turn steam completely off.
Wait a few minutes until the iron gets fully hot.
Step 3: Choose the Patch Position
Place the patch where you want it.
Use a measuring tape if you want it centered.
Once the glue heats up, moving the patch becomes difficult.
Step 4: Warm the Fabric
Lay the clothing flat.
Place the cotton cloth over the area first.
Press the iron down for 15 to 20 seconds.
This helps the patch stick better.
Step 5: Place the Patch
Remove the cloth.
Put the patch exactly where you want it.
Make sure all edges are flat.
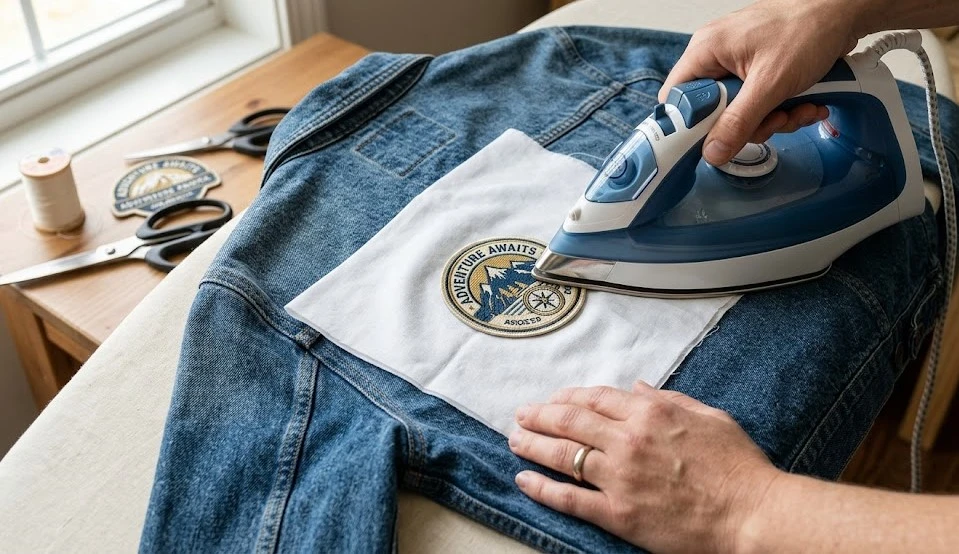
Step 6: Press the Patch
Put the cloth back over the patch.
Press the iron down firmly for 60 seconds.
Do not move the iron around.
Just press and hold.
Step 7: Press Again
Press again for another 60 seconds.
This gives a stronger bond, especially for thick fabrics like denim and heavy custom embroidered patches.
Step 8: Check the Edges
Carefully touch the edges.
If any corner lifts up, press again for another 60 seconds.
Step 9: Press From the Back
Turn the clothing inside out.
Press the back side of the patch area for 60 seconds.
This helps the glue go deeper into the fabric.
Step 10: Let It Cool
Leave the clothing flat for at least 10 minutes.
Do not wear it or fold it right away.
The glue needs time to cool and harden.
Why Custom Vector Art Services Matter
If you order custom embroidered patches or custom sublimation shirts in USA, good artwork is very important.
Custom vector art services help turn blurry logos into clean designs that look sharp when printed or embroidered.
This is useful for businesses, sports teams, schools, and events in cities like Los Angeles, Houston, Seattle, and Orlando.
StitchKrafts USA recommends vector files like AI, EPS, or PDF because they keep the design clear at any size.
StitchKrafts USA and Custom Sublimation Shirts in USA
Custom sublimation shirts in USA are very popular for sports teams, gyms, company uniforms, and event clothing.
Cities like Atlanta, Las Vegas, Austin, and Phoenix use sublimation shirts because the colors stay bright for a long time.
If you are adding custom embroidered patches to custom sublimation shirts in the USA, be careful with the heat.
Too much heat can damage polyester fabric or affect the printed colors.
StitchKrafts USA recommends using a cotton cloth and pressing carefully.
For the best results, many people lightly iron the patch first and then sew around the edges for extra strength.