How to Sew a Patch on a Backpack Without Damaging It
We have shared simple steps anyone can follow, no experience needed.
Quick Answer
Pin your patch where you want it. Thread a needle, stitch around the edge, and tie it off. Done. For iron-on patches, bond with heat first, then sew over it for a hold that never peels. The whole thing takes under 20 minutes.
Why Sew a Patch on a Backpack?
Iron-on patches look great when they are new. But backpacks take real punishment every single day. The straps pull. The bag gets squashed. It gets washed.
Over time, the iron-on adhesive weakens, especially on nylon and polyester bags. Edges start lifting. Corners peel. The patch eventually falls off.
Sewing fixes that permanently.
Whether you are a student carrying your bag through school every day, a traveler moving through cities like New York or Chicago, or someone who wants their custom patch to stay put, sewing is the right option for you.
At StitchKrafts USA, every patch we make is built to be sewn. Clean borders. Solid backing. Easy to stitch. Easy to keep.
How Do You Attach Patches to Backpacks?
There are three ways to attach a patch to a backpack:
Sewing
The strongest method. Works on every backpack material. Lasts for years. This guide covers sewing in full.
Iron-On Bonding
Fast and easy, but weaker on nylon and synthetic bags. Best used as a first step before sewing, not as the only attachment method.
Sew Then Iron
The best of both. Bond the patch first so it sits perfectly still, then sew around the border for a permanent hold. This is the method we recommend at StitchKrafts USA.
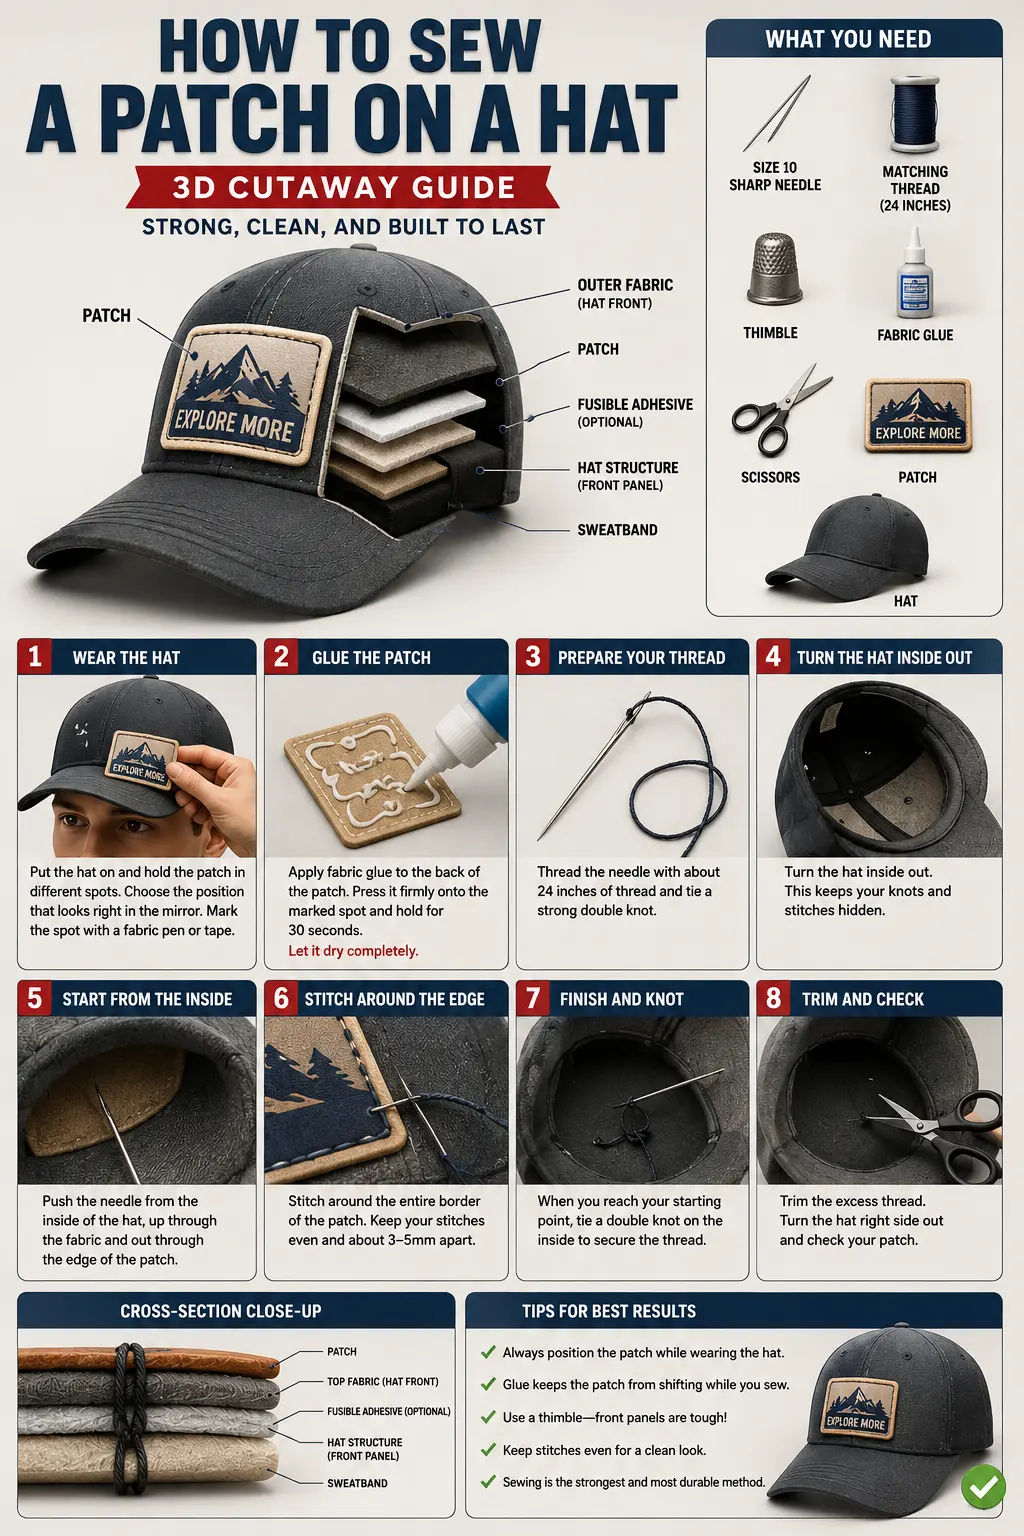
What You Need
You do not need a sewing machine. Everything below is hand sewing:
- Needle standard sharp or denim needle for thick bags
- Thread about 20 inches per patch
- 2 to 3 safety pins
- Scissors
- Thimble is optional but helpful on thick fabric
- Iron and thin cloth only if your patch has iron on the backing
That is it. No special skills. No machine. Just a needle and thread.
Simplest way for How to Sew a Patch on a Backpack
Step 1
Pick the Right Spot
Lay the backpack flat on a table.
Hold the patch in different positions before deciding. Two things to avoid:
- Seam the stitched lines on your bag. They are thick and hard to needle through.
- Many bags have internal layers with padding or dividers behind the outer panel. You only want to sew through the outer fabric, not accidentally stitch the bag shut.
Before you start, open the backpack and slide a thin book or piece of cardboard inside behind the panel you are working on. This separates the outer fabric from everything inside.
Step 2
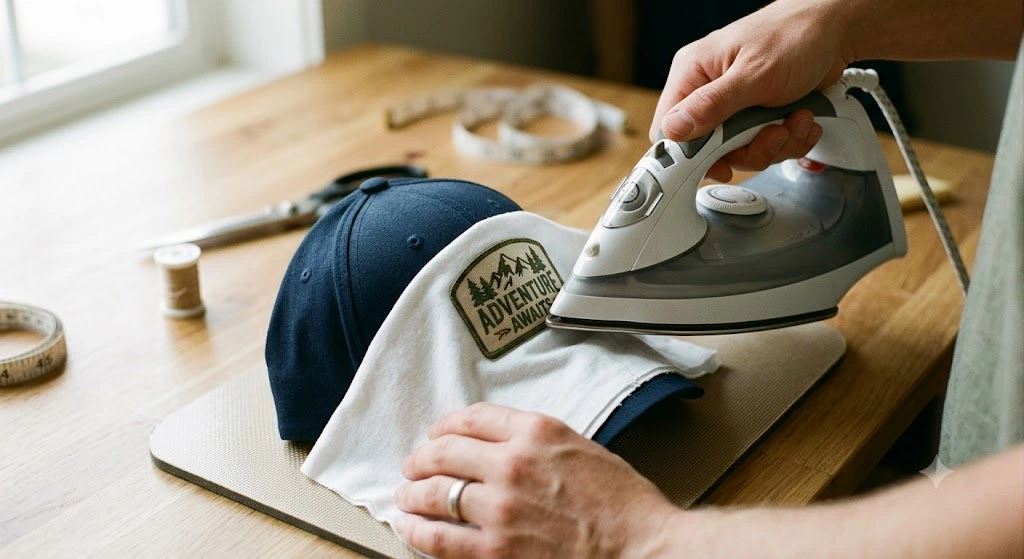
Bond With Heat First
Skip this step if your bag is nylon.
If your patch has an iron-on backing, do this step. If your bag is nylon, waterproof, or heat sensitive, skip straight to Step 3.
- Lay the backpack flat on a firm surface.
- Place a thin cloth over the spot where the patch will go. Press with a hot iron for a few seconds to warm the area.
- Remove the cloth. Place the patch exactly where you want it.
- Cover with the cloth again. Press down hard with a hot iron for up to 60 seconds. Do not slide, press straight down.
- Lift the iron. Check that the patch is bonded. If any corner lifts press again.
This step locks the patch in position so it cannot move while you sew.
Step 3
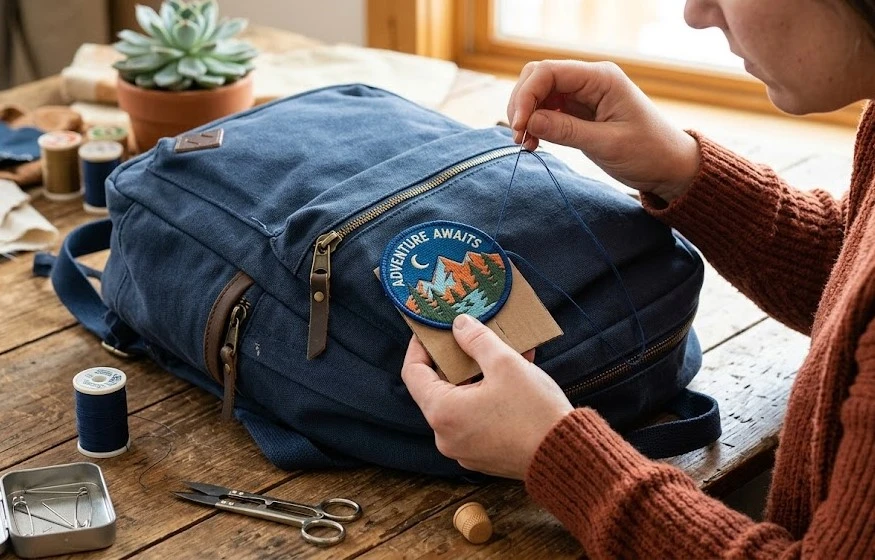
Pin the Patch
Use two or three safety pins to hold the patch flat against the backpack.
Make sure the patch lies completely flat with no bubbling or lifting at the corners.
Step 4
Thread the Needle
Cut 20 inches of thread. Fold it in half to find the middle, make a small loop, and push that loop through the eye of the needle. Leave about 3 to 4 inches hanging loose on one side.
This gives you a doubled thread that is stronger than a single strand.
Step 5
Start Stitching
Start at one corner:
- Push the needle through the edge of the patch and down into the backpack fabric.
- Pull the thread through, leaving a small 1-inch loop at the entry point.
- Bring the needle back up from inside the bag through the edge of the patch.
- Pass the needle through that loop.
- Pull gently until the loop closes flat.
This locks your thread in place without a knot on the surface.
Step 6
Sew All the Way Around
Keep going around the full border of the patch:
- Down through the patch edge into the bag
- Back up from inside through the patch edge
- Pull firm after every stitch
Keep stitches about 3 to 5mm apart. Even spacing makes the finish look clean and professional.
Use the thimble to protect your thumb on thick panels, canvas, and reinforced nylon, which resists the needle more than regular fabric.
Step 7
Finish and Tie Off
When you have gone all the way around:
- On your last stitch going inward, leave a small loop instead of pulling tight.
- Bring the needle back through from the inside and pass it through that loop.
- Pull snug.
- Repeat this three to four more times in the same spot.
This creates a secure knot that will not loosen.
Step 8: Cut the Thread
Snip the thread close to the fabric on the inside of the bag. Leave about 5mm so it cannot slip back through.
Remove the safety pins. Flip the bag over. Your patch is done.
How to Put a Patch on a Backpack Without Sewing
If you do not want to sew, iron-on bonding is the easiest option.
Here is how:
- Place a thin cloth over the area where the patch will go.
- Press with a hot iron for a few seconds to warm the fabric.
- Remove the cloth. Position the patch exactly where you want it.
- Cover with the cloth again.
- Press straight down with a hot iron for up to 60 seconds. Do not slide.
- Let it cool before touching.
Important: Iron-on bonding works best on cotton and canvas bags. On nylon, polyester, and waterproof materials, the adhesive does not grip reliably and will likely peel within weeks.
For those materials, sewing is the only method that truly holds.
If you want a no-sew option that actually lasts, use fabric glue rated for use on synthetic materials. Apply a thin layer to the back of the patch, press firmly, and leave it flat to dry for 24 hours.
How to Patch a Ripped Backpack
A torn or ripped backpack panel can be repaired using a patch, and the process is almost identical to decorative patching.
For Small Tears or Holes
- Cut a patch slightly larger than the tear, with at least 1 cm of overlap on every side.
- Place the patch over the tear on the outside of the bag.
- Pin it in place.
- Sew all the way around the border using the steps above.
For a clean repair, use a patch made from a similar material to the backpack fabric, canvas on canvas, nylon on nylon.
StitchKrafts USA custom patches come with solid woven bases that work well as repair patches, too.
For Large Tears
Sew a patch on the outside and place a second patch on the inside of the same area. Stitch both layers together for a stronger repair that holds under pressure.
For Decorative Repair
This is where patches become part of the design. Cover the damaged area with a custom embroidered or chenille patch. Nobody will know there was a tear; they will see a great-looking patch.
How to Sew a Patch for Beginners
If you have never sewn anything before, do not worry. This is one of the simplest hand sewing projects there is.
Start here:
- Use a needle that is not too thin; a standard sharp or medium gauge is easiest to grip.
- Use thick thread; it is easier to see, easier to pull, and stronger than fine thread.
- Go slow. One stitch at a time.
- Do not pull too hard. Firm and even is all you need.
The One Beginner Mistake to Avoid
Pulling stitches so tight that the backpack fabric puckers and bunches around the patch. Pull until the thread sits flat, not until the fabric gathers.
Practice Tip
If you are nervous about stitching on your actual bag, practice the motion on a spare piece of fabric first. Five minutes of practice makes the real thing much easier.
Custom patches from StitchKrafts USA feature clean merrowed borders and a raised woven edge, which serves as a natural guide for your needle. Stitch along the inside of that border all the way around, and your stitching will look neat and even every time.
Sewing Custom Chenille Patches
Custom chenille patches are the thick, plush, raised-texture patches you see on varsity jackets and premium bags. They are popular across the US and increasingly common in the UK.
Because they are thicker than standard embroidered patches, they need a slightly different approach:
- Use a heavier needle; a denim needle works best.
- Use a thicker thread buttonhole or heavy-duty polyester thread.
- Stitch through the flat woven base at the very edge, not through the chenille pile itself.
- Never iron chenille patches; heat flattens the pile permanently. Sew only.
StitchKrafts USA custom chenille patches come with a sew-on base designed specifically for them. The backing is firm and easy to stitch through, even for beginners.
Common Mistakes to Avoid
Sewing Through Internal Layers
Always slide the cardboard inside the bag before you start. This is the most common beginner mistake and the hardest to undo.
Placing the Patch Over a Seam
Seams triple the fabric thickness and will bend or break your needle. Always position on a flat panel.
Using a Thread That Runs Out Mid Stitch
Twenty inches is the right length. Shorter than that, and you risk running out before you finish, which creates weak spots.
Skipping the Iron Step on Iron-On Patches
Even if you are sewing anyway, bonding first keeps the patch perfectly still. A patch that shifts mid-stitch results in uneven, puckered stitching.
Ironing Nylon or Waterproof Bags
Heat damages synthetic materials. If your bag is nylon, waterproof, or coated, skip the iron entirely and sew straight away.
Does the Patch Quality Matter?
Yes, a lot.
Cheap patches have rough edges that are hard to stitch along evenly. The backing frays. The thread pulls out. The border distorts when you try to sew through it.
A well-made patch makes hand sewing easy. Clean merrowed border. Stable woven backing. Consistent edge thickness that your needle follows naturally.
That is what StitchKrafts USA focuses on: patches that are properly applied, last long, and look sharp, whether you are carrying your bag through the streets of Los Angeles or London.
Frequently Asked Questions
How do you attach patches to backpacks?
The three main methods are sewing, iron-on bonding, and a combination of both. Sewing is the most durable method and works on all backpack materials. Iron-on bonding alone works on cotton and canvas, but often peels on nylon and synthetic bags. For the strongest hold, bond with heat first, then sew around the border.
How do you patch a ripped backpack?
Place a patch over the tear with at least 1 cm of overlap on all sides. Pin it in place and sew all the way around the border. For large tears, place a second patch on the inside and stitch through both layers. For a clean look, use a custom-embroidered patch to cover the damaged area decoratively.
How do you sew a patch for beginners?
Pin the patch in place. Thread a needle with 20 inches of doubled thread and stitch through the edge of the patch and into the bag fabric all the way around. Finish with three to four loop stitches to lock the thread. Go slowly, keep stitches even, and do not pull too tight. It takes about 15 minutes and gets easier every time.
How do you put a patch on a backpack without sewing?
Place a thin cloth over the area, press with a hot iron to warm the fabric, remove the cloth, reposition the patch cover, and press hard for up to 60 seconds. This works well on cotton and canvas bags. For nylon and waterproof materials, use fabric glue rated for synthetics instead of iron-on adhesive, which does not hold reliably on those surfaces.
Can you sew a patch on a nylon backpack?
Yes. Skip any ironing step, use a standard sharp needle, and slide a piece of cardboard inside the bag before you start. Sewing is actually the best method for nylon backpacks because iron-on adhesive rarely adheres reliably to synthetic fabric.
How long does it take to sew a patch on a backpack?
Most standard patches take 10 to 20 minutes by hand. Larger patches or thick custom chenille patches may take 20 to 30 minutes. With a little practice, the process becomes quick and straightforward.
Can you remove a sewn patch later?
Yes. Use a seam ripper to cut each stitch along the border carefully. Work slowly to avoid catching the backpack fabric. Any iron-on adhesive underneath can be softened with a hair dryer and peeled away cleanly.
The One Rule That Covers Everything
Slide the cardboard inside the bag before you start. Stitch only through the outer fabric. Keep stitches even and tension firm but not tight.
Everything else is just repetition, and it gets easier every time.
For patches worth sewing, visit StitchKrafts USA. Clean borders, solid backing, made to last.