Repairing a Loose Patch Corner Before It Falls Off
Quick answer: If a patch corner is lifting, fix it today. For an iron on patch, press the corner again with a hot iron over a thin cloth. For any patch, sew a few small stitches across the corner. A loose corner is easy to fix now, and much harder once the whole patch has come off.
A lifting corner is like a small tear in a sock. It is nothing at first, but it gets bigger every time you wear and wash it. The good news is that the repair takes anywhere from two minutes to twenty. Pick the one that fits your patch and your time.
First, Find Out What Is Holding Your Patch On
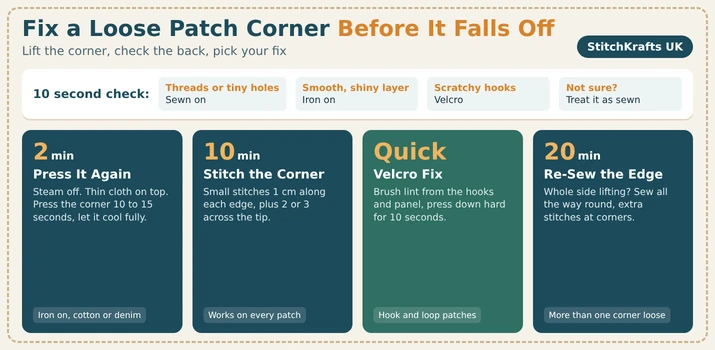
The right repair depends on one thing: how the patch is attached. Do this ten second check.
Lift the loose corner gently and look underneath.
- You see little threads or tiny holes in the fabric. It is sewn on. Go to the 10 minute fix.
- You see a smooth, shiny layer, a bit like clear plastic. It is iron on. Go to the 2 minute fix first.
- The back is scratchy, and there is a soft panel underneath. It is Velcro. Go to the Velcro fix.
- Not sure? Treat it as sewn. Stitches work on every kind of patch.
The 2 Minute Fix: Press It Again (Iron On Patches Only)
Iron on glue is made to melt with heat. That means heat can often put it back.
- Turn the steam off. Steam makes water, and water weakens the glue.
- Set the iron to the heat the fabric can take. Check the label inside the clothes.
- Put a thin cloth, like a tea towel, over the patch.
- Press straight down on the loose corner for 10 to 15 seconds. Do not slide the iron around.
- Let it cool all the way down. Do not poke it while it is warm.
- When it is cold, test the corner gently with your fingernail.
- Wait 24 hours before washing the item, so the glue can settle.
For a step by step guide to the full process, our guide on ironing patches on easily shows how to get a strong first bond.
A warning: Do not use this on polyester sportswear, nylon bags, or anything shiny and stretchy. Heat can melt those fabrics. If your item is made from one of those, skip to the 10 minute fix.
The 10 Minute Fix: Lock the Corner With Stitches
This works on every patch, and it is the fix that lasts the longest. It also fixes iron on patches that keep lifting after you press them.
What you need: a needle, strong thread in a colour that matches the patch border, and small scissors.
- Cut a piece of thread about as long as your arm. Fold it in half so it is doubled, and tie a knot at the end.
- Start from the inside of the clothes, so your knot stays hidden. Push the needle up just beside the loose corner.
- Sew small stitches along each edge of the corner, about 1 centimetre either side. Keep them about 3 millimetres apart.
- Add two or three stitches straight across the very tip of the corner. This is the spot that lifts first, so it needs the most hold.
- Pull the thread snug, but not tight. If you pull too hard, the fabric will bunch.
- Tie a firm knot on the inside, and trim the end.
If you want more help getting neat, even stitches, our guide on sewing a patch on a sleeve shows how to do it without puckering.
The Velcro Fix: Clean It and Check the Panel
Velcro patches rarely lift because of the glue. They lift because the hooks are clogged, or the soft panel is worn.
Brush the hook side of the patch with a clean toothbrush to pull out the lint. Brush the soft panel too. Press the patch down hard for ten seconds. If it still will not stay, the panel may be worn out or coming unstitched. Sew the panel back on, or replace it.
The 20 Minute Fix: Re-Sew the Whole Edge
If more than one corner is loose, or a whole side is lifting, the quick fixes will not be enough. The patch has lost its grip all the way round.
Re-sew the full edge. Start from the inside, and work slowly around the patch with small stitches, going over the border each time. Add extra stitches at each corner. This is the same method as sewing a new patch, and it makes the old one as good as new.
If you want a backup on top, put a very thin line of fabric glue under the loose edge, press it flat, and leave it to dry fully. Use only a little, since too much glue goes hard and shiny. Skip glue on stretchy fabric and leather, where it can crack.
When to Stop and Replace the Patch
Sometimes a repair is not worth it. Replace the patch if the border has come apart along a big section, if the fabric under the patch is torn, or if the patch itself has warped or curled and will not lie flat.
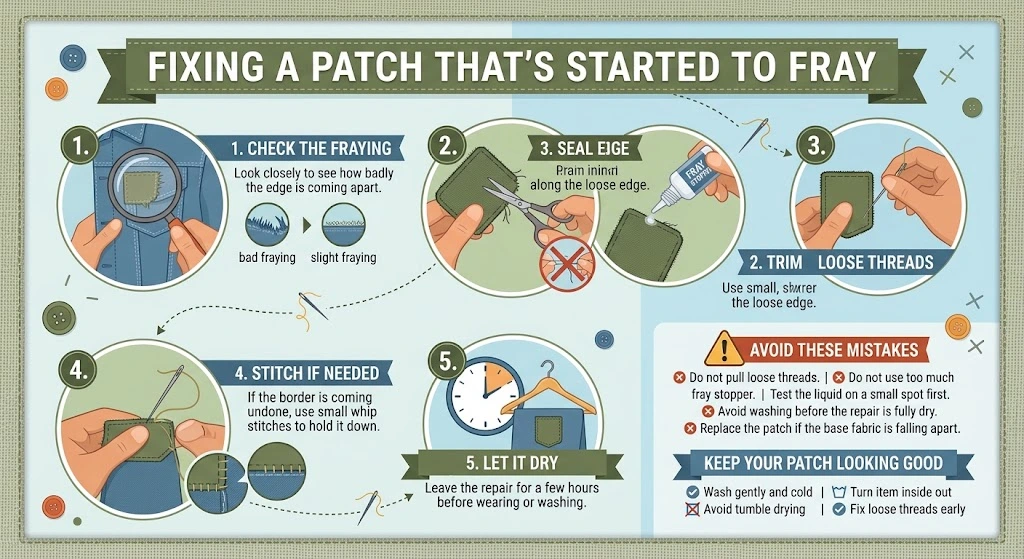
If the border is the problem rather than the corner, our guide on fixing a patch that is fraying at the edges will help you decide.
A well made embroidered patch has a tight, thick border and is built to be sewn on, which makes it much less likely to lift in the first place.
Why Do Corners Lift First?
Corners get the most strain. When you pull a jumper on, the fabric stretches, and the corner of a patch gets tugged in two directions at once. Edges only get pulled one way, but corners get pulled two, and glue or thread gives up there first.
That is also why stitches across the corner work so well. They hold the exact spot that takes the most pull.
Which Fix Is Best for Your Fabric?
| Fabric | Best Fix | Why |
| Cotton or denim | Re-press, then add corner stitches | Handles heat well |
| Polyester sportswear | Stitches only | Heat can melt it |
| Nylon bag | Stitches only | Iron on glue rarely sticks to nylon |
| Leather | Stitches, with clips instead of pins | Heat can scorch it |
| Wool blazer | Stitches, sewn to the outer layer only | Heat can mark it |
| Stretchy fabric | Small, loose stitches | Tight stitches pucker |
Keep Corners From Lifting Again
Once a week, run your finger around the edge of the patch. If you feel a corner lifting, fix it that day.
Wash patched clothes inside out, on a cold, gentle setting. Skip the tumble dryer, since heat can soften the glue and loosen the thread. For more general help with placement, our guide on putting a patch on a jacket covers how to start off right.
Common Mistakes to Avoid
- Leaving the steam on while pressing.
- Picking at the corner while it is still warm, which breaks the new bond.
- Using too much glue.
- Using thread in a very different colour from the patch.
- Pulling loose threads instead of cutting them.
- Waiting until the whole patch is hanging off.
Frequently Asked Questions
How do you fix a patch corner that is coming up?
For an iron on patch, press the corner with a hot iron over a thin cloth for 10 to 15 seconds. For any patch, sew a few small stitches across the corner.
Why does my patch keep peeling at the corners?
Corners take the most strain from stretching and washing, so glue and thread give up there first. Stitches across the corner stop it.
Can I fix a loose corner with glue?
Yes, a thin line of fabric glue under the lifted corner can work. Use a small amount, press it flat, and let it dry fully.
How long should I wait before washing a repaired patch?
Wait at least 24 hours after re-pressing an iron on patch, so the glue can set.
Will ironing damage sports kit?
It can. Polyester and nylon melt easily, so stitching is the safer repair for sportswear and bags.
Is it better to replace a patch with a loose corner?
Not usually. A loose corner can be repaired in minutes. Replace the patch only if the border or the fabric underneath is badly damaged.
Need a Patch That Stays Put?
If your old patch has seen better days, we can make you a new one. Browse our custom patches to see the types, borders, and backings available. StitchKrafts UK works with schools, clubs, and businesses in London, Birmingham, and across the country, and can help you pick a backing that suits the clothes you will wear it on.